28 May 2012

Oil Cap replacement

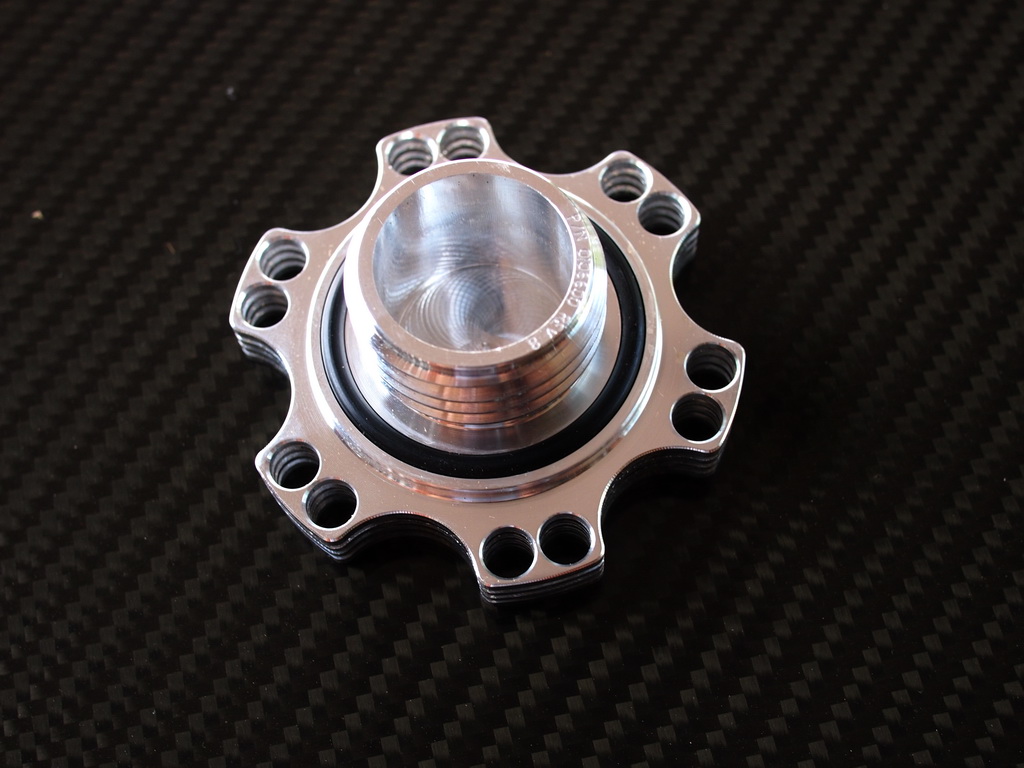
Some "bling bling" for the engine bay. 


The main reason or excuse for the aluminum oil cap was because I noticed the original plastic oil cap had part of the thread chipped off... ..next thing you should be wondering about is; where did the part that got chipped off go to...


EG6 UltraRacing Front Lower bar

I had my UltraRacing Front Lower bar installed recently.


From the photo, it is obvious that there is clearance issue from the 4-1 exhaust manifold, even with the cover removed due to the "bracket" to bolt on the cover.

So I had to grind off the bracket off to have proper clearance.

Take note of this, if u r going to install the front lower bar.

20 May 2012

EG6 "squeaky" clutch

For those with "squeaky" clutch, this may just solve your problem.
The cause is likely due to lack of grease between the clutch slave cylinder and the release fork.


Just pop the ball of the clutch slave cylinder out and apply generous amount of hi-temp grease. 

This should get rid of the squeaky sound in most cases.


05 May 2012

EG6 PasswordJDM Power Chamber repair

Filter Side
This is what happens when u are over-zealous in tightening Kevlar stuff that does not have reinforcement.  The damage was done by a green-horn mechanic when he was putting back my intake... (Not going to let anyone touch my intake from today onwards..)


Throttle body side


 I got some woven mat fiberglass and resin for the repair.  Epoxy resin would be prefer as it adhere better as that was likely used for the power chamber, however resin was readily available for me.

Woven mat was used as it is thinner and easier to work with, and the intention is not to build up thickness but to repair and reinforce.


 Laid 2 - 3 layers all round the opening.


Filter side repaired and reinforced


Excess was cut off before it was fully set. 


Throttle-body end repaired


Now the ends are stiffer and less likely to crack.  If you own one of these, you may want to consider doing the same for reinforcement to prevent cracking.

01 May 2012

EG6 Wiper Washer Motor (Front and Rear)

Got new wiper washer motor as the rear wiper washer motor was getting weak.

Front wiper washer motor part no. 38512-SF0-J01
Rear wiper washer motor part no. 38512-SB0-J01
Rubber grommet (Water tank bush) part no. 38519-SB0-003 (need one for each motor)
Total cost is about USD$80


The motors are located behind the inner fender splash shield.


There isn't any bolts holding the motor in place, the installation just requires it to be 'clipped' in place.  Therefore, just a flat screwdriver to ply it out.

For installation, just reverse the steps. The plugs are specific, they will only fit the correct motor.


New wiper washer motor installed


30 April 2012

EG6 Glove Box Lock Assembly / Latch

Missing latch
New Lock Assembly (part no. 77520-SR3-013ZB) for about US$11.00


Remove screw to remove lock assy


New Lock Assembly in place

27 April 2012

EG6 water hoses


I was doing my routine check and realised something is wrong with the bypass outlet water hose (part no. 19508-P08-000).  The part going to the intake manifold was bloated and it felt softer than the rest of the hose.


The reason was that the inner wall was cracked and water is slipping into the outer layer.  It won't take long before the hose bursts.


These are my old radiator hoses.  It seems shorter than it was suppose to be, therefore I had a extension fabricated.  As for the red silcon tape and cable ties, it was meant to prevent abrasion against protruding fittings on the gearbox.


Luckily, I bought some 'SAMCO' hoses sometime back as spare ;)


Fits very well and the length is correct, as the clearance from the gearbox is much better even without the extension I had.

25 April 2012

EG6 ULTRA RACING fender brace 'install'

Following on from my previous posting the EG6 Fender Brace / Bar, I finally got down to TRY to get it install myself. 


Before starting, it is a good idea to get the rust convertor and some paint, just in case there is rust behind the side skirt.


To remove the fender, u can choose remove the side skirt to assess the on of the bolts hiding behind or u can choose to bend the side skirt a bit to assess the bolt.  For me, I choose to be safe, in case I damage the side skirt.

To remove the side skirt, just remove 2 screws at the front and some plastic retainers below.  Then push the side skirt towards the front of the car and it will come off.


Lucky for me, there was no rust :D


To fix back the side skirt. Remove the plastic retainers from the car body, slot it back onto the side skirt, and push the side skirt back on. 

Plastic Retainers for side skirt


Twist to 45 degrees


Should come off quite easily


Slot it back onto the side skirt


Ready to clip it back on


Finally got the fender off..


The top of the Ultra Racing fender brace / bar aligns well to the door hinge bolts


The bottom part aligns well too...


.... However, there is no place to bolt the fender bar on.  (UR provide bolts and nuts, so that u 'can' bolt them on)


 I got the picture off Ultra Racing website. You can see that it is bolted on in the picture.  I made a few checks with fellow EG owners, apparently for all EGs there is no way u can assess the space behind that part of the chasis unless u cut a hole... no way..


The solution will be to have it welded on instead... so into the storeroom the fender brace goes..


Luckily, I got to replace my door hinges.  So the effort to remove the fenders was not wasted.


Conclusion:  The fender brace was well-made BUT ULTRA RACING DO let the buyers know that it is NOT a DIRECT BOLT ON!!

22 April 2012

S2000 Master Clutch Cylinder into Civic EG without spacer

Continuing from the previous post 's2000 master clutch cylinder prep' which I had prepare the master clutch cylinder for the installation without the need for the spacer.

For the original master clutch cylinder, the fluid line enters from the top and the fitting/thread is 10mm x 1.0 Inverted  flare


The slave cylinder has the same fitting size of 10mm x 1.0 Inverted  flare


 I had gotten the following before the install
1) -3 AN Female to 10mm / 3/8 Banjo 32" 3/16 or AN3 steel braided hose.
2) -3 AN to 10mm x 1.0 adapter for inverted flare  (Take note of the requirement for inverted flare)
3) Steel Banjo Bolt with 10mm x 1.0 thread.  Includes Crush Washers. - 0.425 inch height
Tools:

The picture shows the banjo fitting on the master brake cylinder which is the same for the master clutch cylinder.


The picture shows the -3 AN to 10mm x 1.0 adapter fitting on the master brake cylinder which is the same for the slave clutch cylinder. 


Complete installation


 I used 32" of braided line, keeping the line as short as possible while allow some movement of the engine. This is for a right hand drive car, for left hand drive it would be much longer.

As the original line are mostly hard lines which will mean that there is minimum line expansion. Although the steel braided hose is used here, but line expansion will still occurs when the clutch is depressed. Therefore, longer the line = more line expansion.  So do keep the braided line as short as possible.

For the length I used for my braided line, the clutch feels, engage and disengage well.